
Phone Settings (Menu 3)
To access Menu 3, press
MENU, then !#until you see
PHONE SETTINGS
. Press
OK.
37
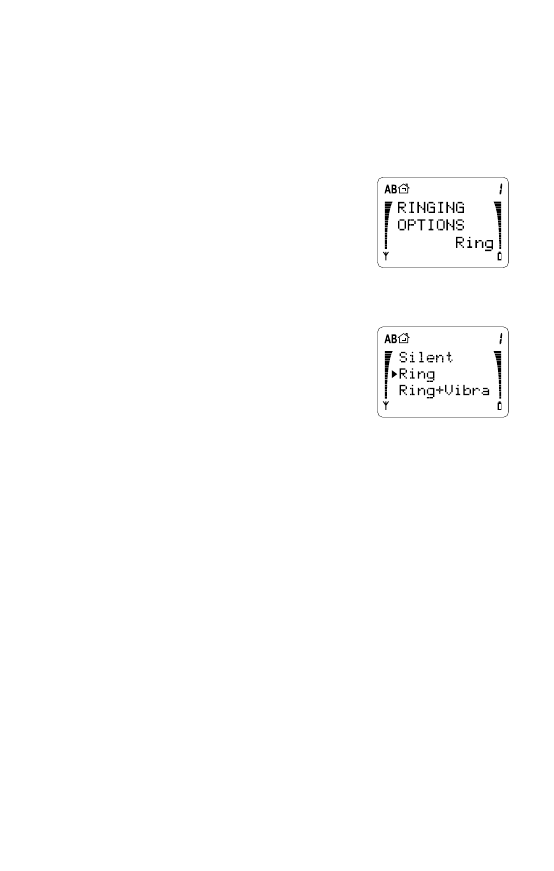
Ringing Options (Menu 3 1)
You can choose how you want the phone to indicate that
there is an incoming call.
1
Press
MENU then !#until you see
PHONE SETTINGS
.
Press
OK.
2 You’ll see
RINGING OPTIONS
and the current setting. Press
OK
if you want to change it.
3 Press !#to move the pointer to
the choice you want. Press
OK to
select one.
For
Ring
+Vibra
or
Vibrate
to
work, you need the Vibra battery
(BML-8).
If you choose
Silent
, the phone
displays
SILENT
when you aren’t
using the other functions of the phone. This message is to
remind you that the ringing tone is set to Off.
Note: When
SILENT
is selected, all tones, except for the
charger-connected tone, are also switched off.
If you choose
Increasing
, ringing will start at the lowest
volume level, and then increase to the highest level.
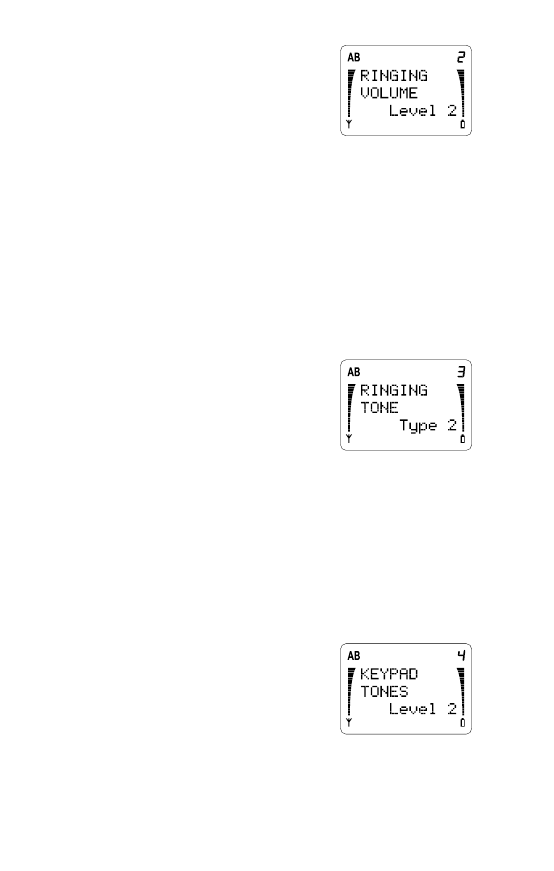
Ringing Volume (Menu 3 2)
With this menu you choose the ringing volume. As you
scroll through each of the 5 volume levels, the phone rings
so you can hear each level.
1
Press
MENU then !#until you see
PHONE SETTINGS
.
Press
OK.
38
2 Press ! to scroll to
RINGING
VOLUME
and the current setting.
Press
OK if you want to change it.
3 Press !#to move the pointer.
Press
OK for the ringing volume
you want.
Ringing Tone (Menu 3 3)
There are 6 different ring tones to choose from. As you
scroll through each type, the phone rings so you can hear
each one.
1
Press
MENU then !#until you see
PHONE SETTINGS
.
Press
OK.
2 Press ! to scroll to
RINGING
TONE
and the current setting.
Press
OK if you want to change it.
3 Press !#to move the pointer.
Press
OK for the ringing tone you
want.
Keypad Tones (Menu 3 4)
When you press the buttons on your phone, the phone
beeps (the sound depends on which key you press). With
this menu, you can choose between three volume levels
or you can turn the keypad tones off.
1
Press
MENU then !#until you see
PHONE SETTINGS
. Press
OK.
2 Press ! to scroll to
KEYPAD
TONES
and the current setting.
Press
OK if you want to change it.
3 Press !#to move the pointer. Press
OK to choose the
one you want, or select Off.
39
Note: You can still send Touch Tones even when the
keypad tones are switched off.
Note: Keypad tones are set to Off when you choose
Silent
in “Ringing Options (Menu 3 1)”. See page 37.
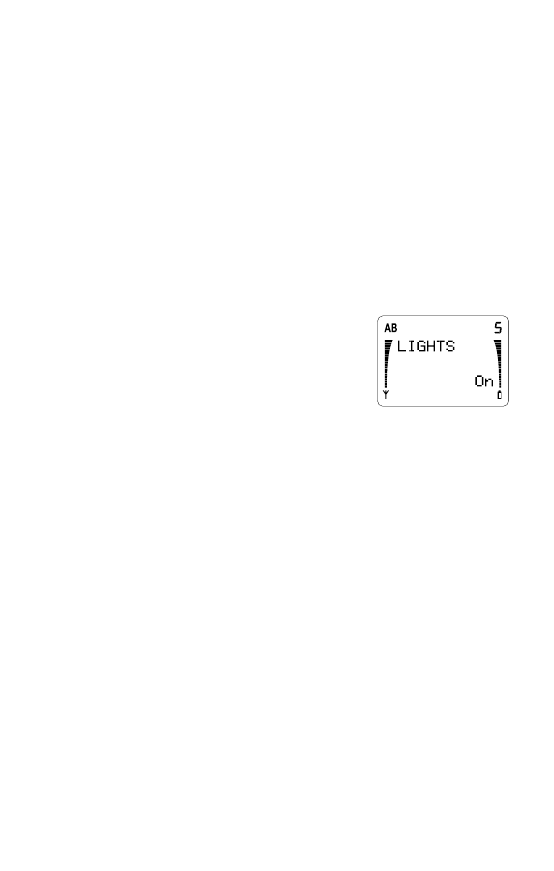
Lights (Menu 3 5)
The keypad and phone display have lights to make them
easy to read. This menu allows you to set the phone's
lights On or Off.
1
Press
MENU then !#until you see
PHONE SETTINGS
.
Press
OK.
2 Press ! to scroll to
LIGHTS
and
the current setting. Press
OK if
you want to change it.
3 Press !#to move the pointer.
Press
OK to choose On or Off.
Lights On
The keypad and display backlights are on for 15 seconds
after the last keypress.
Lights Off
The lights are off permanently, except if Silent ringing is
selected. Then they flash to indicate an incoming call.
1-Touch Dialing (Menu 3 6)
This menu gives you the option of dialing memory loca-
tions 1-8 by pressing and holding a single number key for
2 seconds (location 1 is recommended to be used for the
Voice Mailbox Number). For example, pressing and
holding 5 dials the number stored in location 5.
1
Press
MENU then !#until you see
PHONE SETTINGS
.
Press
OK.

40
2 Press ! to scroll to
1-TOUCH
DIALING
and the current set-
ting. Press
OK if you want to
change it.
3 Press !#to move the pointer.
Press
OK to choose On or Off.
With 1-Touch Dialing On, you can dial the number stored
in any of the locations 1 to 8, by pressing and holding the
corresponding number key. If you press and hold 1, the
phone dials your voice mailbox number if you have stored
it in this location.
Note: 1-Touch Dialing does not operate when Keyguard is
On, or when a call is already established.
If you press and hold 9, the phone attempts to make a call
to the emergency number pre-programmed into your phone
if you have Emergency 9 Dialing (Menu 3 7) set to On.
Emergency 9 Dialing (Menu 3 7)
You may dial the emergency number programmed in your
phone by your dealer, by pressing and holding the 9 key,
only if Menu 3 7 is set to On.
1
Press
MENU then !#until you see
PHONE SETTINGS
.
Press
OK.
2 Press ! to scroll to
EMERGENCY 9 DIALING
and
the current setting. Press
OK if you want to change it.
3 Press !#to move the pointer. Press
OK to choose On
or Off.
Also, you can make an emergency call by entering the
emergency number (such as 911) and pressing
SEND.
41
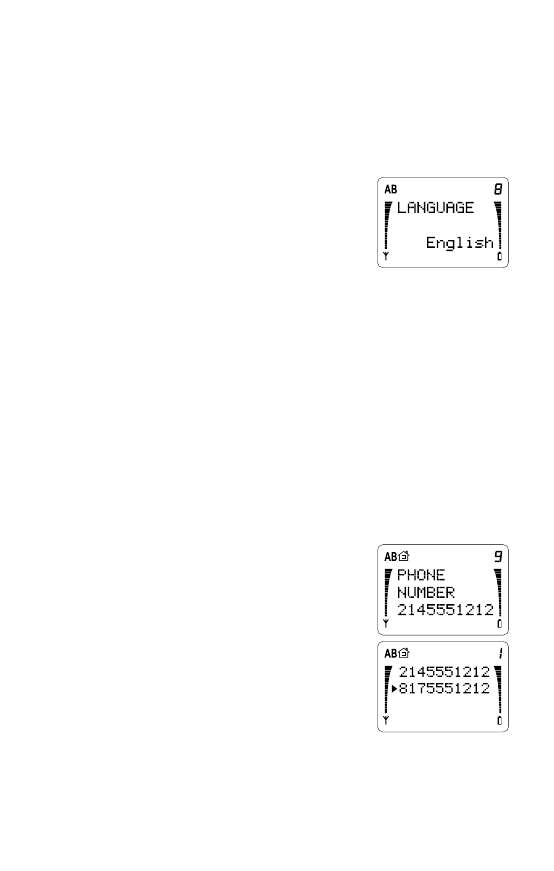
Language (Menu 3 8)
The menus and messages can be displayed in English,
French, Spanish, or Portuguese.
1
Press
MENU then !#until you see
PHONE SETTINGS
.
Press
OK.
2 Press ! to scroll to
LANGUAGE
and the current setting. Press
OK
if you want to change it.
3 Press !#to move the pointer to
your choice. Press
OK to select
an option.
Phone Number (Menu 3 9)
Your phone can have two different telephone numbers.
This menu lets you choose which telephone number to use.
Note: In order to have two different telephone numbers,
you must subscribe to them through your cellular
operator(s).
1
Press
MENU then !#until you see
PHONE SETTINGS
.
Press
OK.
2 Press ! to scroll to
PHONE
NUMBER
and the current phone
number. Press
OK if you want to
change it.
3 Press !#to move the pointer to
the number you want (if there are
two available). Press
OK.
Note: If only one phone number is
programmed into your phone, you’ll only see that number
in this menu.

42
The phone can’t use both numbers at the same time and
you can’t change the number during a call.
If your phone is set to your first number, you can only re-
ceive calls via that number. You may be able to forward
calls from your second number to your first number so you
don’t miss any calls, if this service is available from your
cellular service provider. For more information, please
contact your cellular service provider.
Automatic Answer (Menu 3 10)
Note: This feature applies only if the phone is in a
handsfree car kit.
With Automatic Answer On, the phone automatically
answers after 4 seconds.
1
Press
MENU then !#until you see
PHONE SETTINGS
.
Press
OK.
2 Press ! to scroll to
AUTOMATIC
ANSWER
and the current setting.
Press
OK if you want to change
it.
3 Press !#to move the pointer.
Press
OK to choose On or Off.
Automatic Redial (Menu 3 11)
Sometimes the cellular network is busy and your call can’t
go through. You get a
SYSTEM BUSY...
message and
are asked to redial. If Automatic Redial is set to
On
, the
phone automatically tries 3 more times to connect the call.
If the call connects, the phone beeps to notify you.
1
Press
MENU then !#until you see
PHONE SETTINGS
.
Press
OK.
43
2 Press ! to scroll to
AUTOMATIC
REDIAL
and the current setting.
Press
OK if you want to change
it.
3 Press !#to move the pointer.
Press
OK to choose On or Off.